


Step 2. Specify well sequence parameters
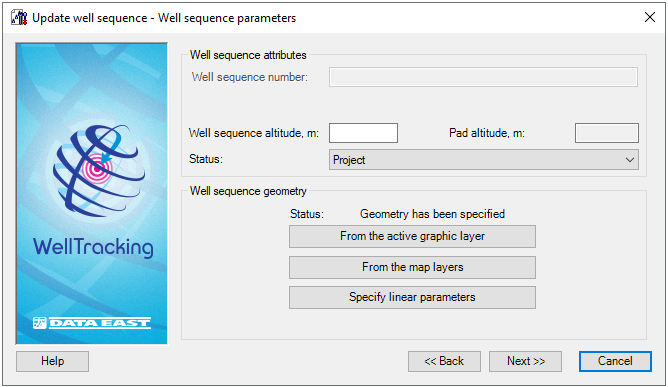
- The well sequence altitude is specified manually. In the Pad altitude line the value set by creating the pad area is specified.
- At this step the user can modify the Status of the well sequence to be updated by selecting the appropriate status from the list: Project or Active.
Specify the feature, which geometry defines the geometry of the created well sequence. There are following methods to do this:
-
To create direction of the well sequence line based on the graphic point to From the active graphic layer option. Select the required feature on the ArcMap map (when getting inside the map area the cursor should look like the cross hair
 ) and the
dialog will be automatically filled in with the parameters of the
created well sequence.
) and the
dialog will be automatically filled in with the parameters of the
created well sequence.
-
Press From the map layers button if the geometry of your well sequence is in one of the map line layers. Then point the cursor
to the required feature or capture it using the frame.
The attribute data of the linear features found in the frame will be represented in the Select feature table. Select the required feature in the list, so that it becomes highlighted on the map and its semantic is shown in the additional dialog on the right.
Click OK button of the table and the location of the well sequence and its length will be represented in the dialog. At the same time extension checks whether the well sequence line locate outside the appropriate pad and returns the warning message if required.
-
Press Specify linear parameters to open the Linear parameters dialog.
The Use map spatial reference option is provided to enter map coordinates, which can differ from the database coordinates. If this option is not checked the feature coordinates will be automatically projected to the database coordinates.
Specify the place on the map where you want to create the well sequence
with the cursor  , enter the
Azimuth and Length
values and press OK.
, enter the
Azimuth and Length
values and press OK.
Set the required attributes and press Next to get to the final step of updating the well sequence.
Press Back to get back to the previous step of selecting the well sequence.
Press Cancel to exit the Update well sequence tool dialog.
*****