


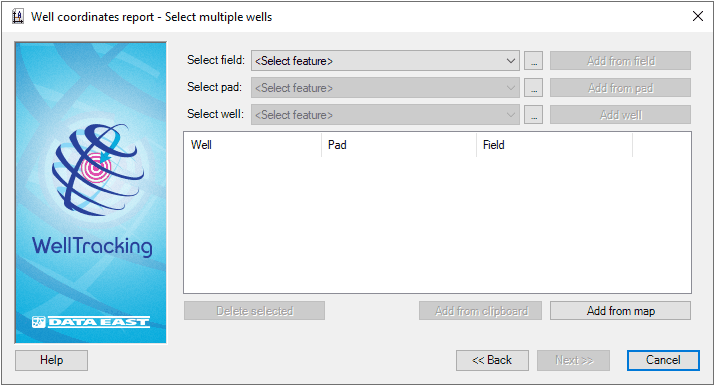
Step 3. Select multiple wells
Specify wells to be used to create the Well coordinates report. To do this select the field from the list in your database and specify the pad, containing the required wells.
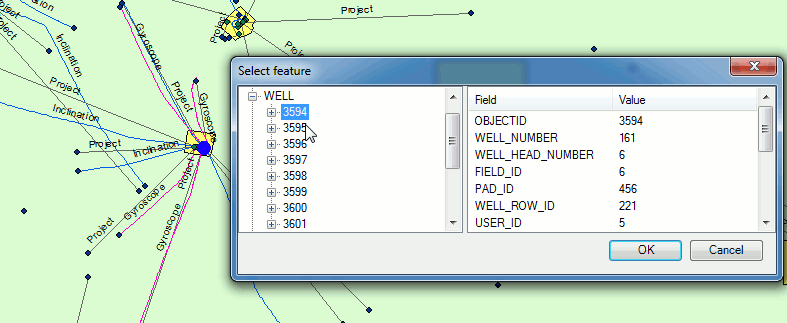
Selection can be performed using different methods. Specify the feature
by selecting it from the list of features in the database or point to
it with the cursor  .
The cursor can be changed to the frame to select an area with several
features, if required.
.
The cursor can be changed to the frame to select an area with several
features, if required.
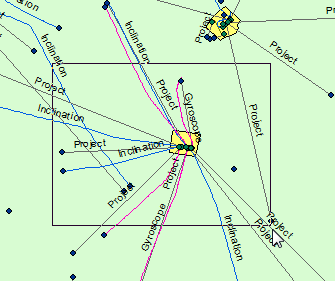
All features, including those partially captured by the frame, are displayed in the feature classes list of the attribute table Select feature. If you select one of the features in the list, it will be highlighted on the map and its attributes will be displayed in the Fields dialog. Select the required feature from the list and press OK.
The Add from field option allows to fill in the dialog with all features, containing in the specified field, i.e. all pads and wells.
The Add from pad option allows to fill in the dialog with all wells of the specified pad.
The Add well option adds the specified well from the list.
To delete data from the list of wells press the Delete selected button. Select the required features using the Shift or Ctrl buttons and press Delete selected.
Using the frame you can add the required features from the map by pressing the Add from map button.
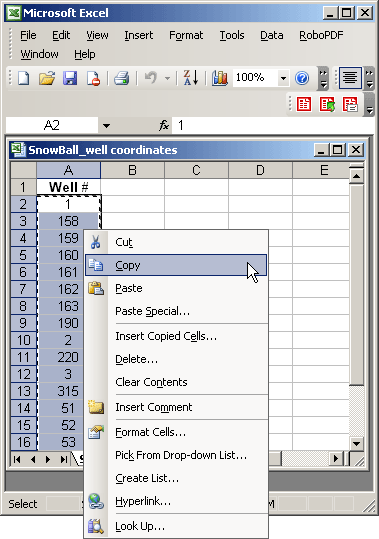
If you need to generate report on multiple wells, use the Add from clipboard option, which allows adding wells from *.xls tables to wizard dialog.
1. Select the required field from the list of fields. The Add from clipboard button becomes enabled.
2. Open the appropriate *.xls table with numbers of wells.
3. Copy the values to clipboard.
4. Press the Add from clipboard button and the dialog will be filled with data about the copied wells.
Click Next to move to the last step of creating report, or Cancel to exit the report creation dialog.
*****